TEXTURING MODELS
This is what you need for custom weapons.
From here on this page is almost an exact copy of Marauxus' tutorial for quake3mods.net, marauxus@zdnetonebox.com I used most of his exact words and all of his screenshots. I know I said that I would make my own, but I was kind of short on time so I just copied, pasted, and cleaned up this tutorial a bit. Why should I rewrite it when it is in it's most perfect form to start with?
Purpose:
To explain basic concept of Replacing Weapon Models and get Textures to work.
What You Need:
-
3d Max 3 (Never tested with any other version)
-
Pop 'N' Fresh plugins for 3dMAX
-
NPherno MD3 Compiler
This tutorial will replace the machinegun's barrel with a plain box and a texture (Just something simple to get the point across.)
1. Open pak0.pk3 in the baseq3 directory (open pk3s with WinZip), find machinegun_barrel.md3 and machinegun.jpg, extract these files to your mod directory.
To create a mod directory go into the folder you installed quake 3, create a new folder and name it whatever you want to call your mod. This will serve as your mod directory any files you want to change (or add) you place in here. To use your mod create a shortcut to quake 3, right-click and go to properties, where it says "path\quake3arena" where path is the directory add after the quotations +set fs_game mymod where mymod is the name of your mod directory.
2. Open 3d Studio Max and press import, select the file type as MD3 and locate the machinegun_barrel.md3 file. It should look something like thiis.
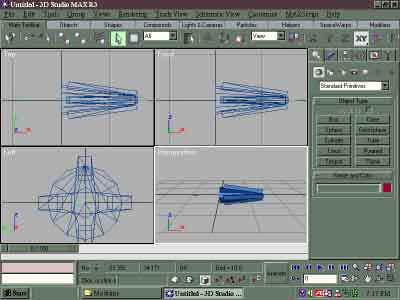
3. Select the b_barrel object and delete it, now select Box from the create menu, on the keyboard entry type in the following X: 7.5 Y: 0 Z: -4 Length: 5 Width: 15 Height: 7.5 See Example Below:
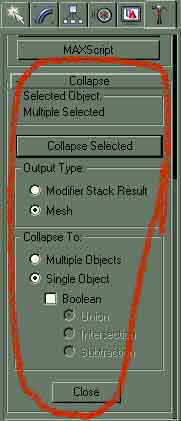
4. This step only applys if the model contains more than one object. Select all parts of the model (excluding the tags) and go to the utilities tab select Collapse and then press Collapse Selected (make sure the options are set to the defaults shown below. (Hint: I know this is obvious, but usually overlooked, if you save after doing this it makes it very hard to change the model because this turns the objects into a single mesh. So save as a different file name)
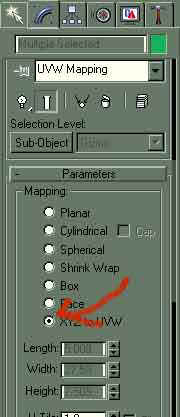
5. Now select the box and apply a UVW modifier and set XYZ to UVW:
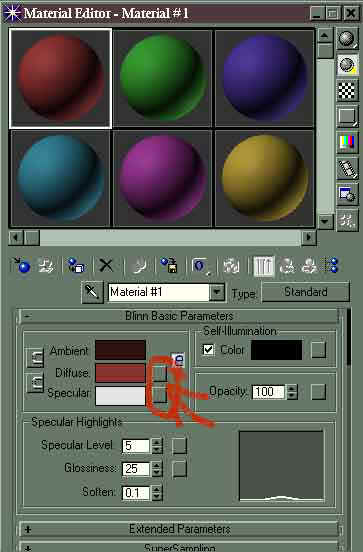
6. Time for texturing. Alright First off save the file if you haven't done so already, next find a simple .JPG, make one, or edit the texture you extracted from the pk3, no matter what you do save over the JPG you extracted in step 1 as the same name (remember this is just a simple example). Now open the Material Editor and select the fiirst slot, next press the small box next to Diffuse and select Bitmap as the type. Direct to machinegun.jpg (Remember that file you just extracted in step 1) and select it. Now go up a level and make an instance of the Bitmap by leftdragging the small box next to Diffuse to the small box below it, then select instance. Select the box and apply the material to it.
7. Now exit the material editor (save again if you wish) and press Edit->Select All. Then go to File->Export and select MD3 as the file type and direct to machinegun_barrel.md3 (the file MD3 you extracted in step 1) press save (or export whichever it is) In the dialog box that appears enter 0 in the frames space. See Pic:

8.You can now close 3D studio. Open NPherno's MD3 Compiler. Select Import Objects and open the machinegun_barrel.MD3 file you just made. Press Rebuild Normals.
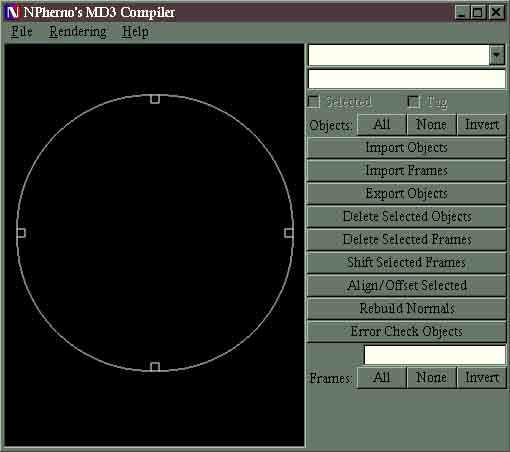
8.Now in the drop down list at the top select the only non tag file and press in selected check box. VERY IMPORTANT!!! Type the path to your texture in the space below the dropdown list in terms of your mod directory... In other words start with the first directory after your mod folder. So for this it would be "models/weapons2/machinegun/machinegun.jpg" See Pic:

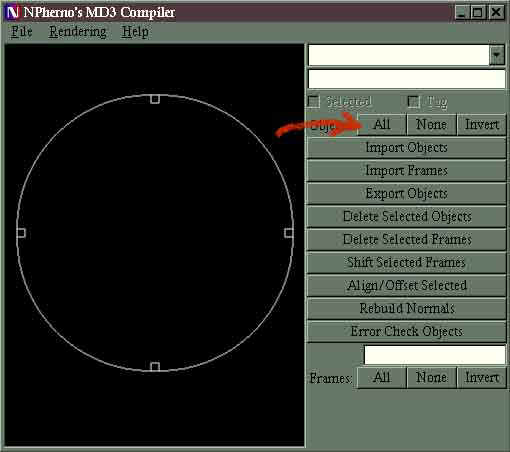
9. Now press "All" next to the word 'Objects:'.
 '
'
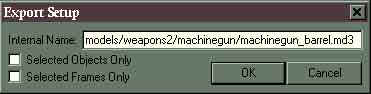
10. VERY IMPORTANT!!! Press "Export Objects" and direct to machinegun_barrel.MD3 (THE same file we've been messing with.) A dialog like the one below should appear.
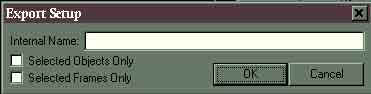
11. Internal Name is much like the texture path this directs to the 3d model though. So Type "models/weapons2/machinegun/machinegun_barrel.MD3" (Hint: You can select the text you just typed and copy it to the clipboard for the next step.) Press OK.
12. Now Quake3 uses a reduced polygon system... in other words as a model gets farther away the polygon count is reduced. You can either make 2 more models each reducing the number of polygons.... or you can cheat and just use the same model which is what I'm going to do. To do this press "Export Objects" again and select the machinegun_barrel.MD3 and edit the name to "machinegun_barrel_1.MD3" you are just adding "_1". This is where copying the path comes in, when the dialog comes down, paste the path and edit it adding the "_1". Now repeat this step replacing the "_1" with "_2". You should now have 3 models.
13. Boot up the shortcut you made earlier and behold your mod. (I'm not sure if you can do this to a shortcut but before you boot up a level with your mod, bring down the console and type "\sv_pure 0". I think you can just add '+set sv_pure 0' after '+set fs_game mymod' to your shortcut.)